Guidelines for developing Brightspace course content, including updating the course homepage, building a glossary, and using images and AI appropriately.
Open Banner Settings
Hover over the banner. The Banner Settings ( …) button will appear in the top right of the banner. Select it.
Select Change Image
You'll find this in the drop-down menu.
Search for an image
Place your cursor in the search bar, then type keyword (s) to describe the image you need.
When you find an appropriate image, hover over it and click the Use this image button that appears.
If you can’t find an image using the Brightspace search tool, you may upload your own image using the Upload button in the top right. SAIT has subscriptions to Adobe Stock (available in Adobe Creative Cloud) and Colourbox.
Return to homepage
You will return to the course home page, as Brightspace is replacing the original image in the
banner.
Go to More > Edit Course > Homepages
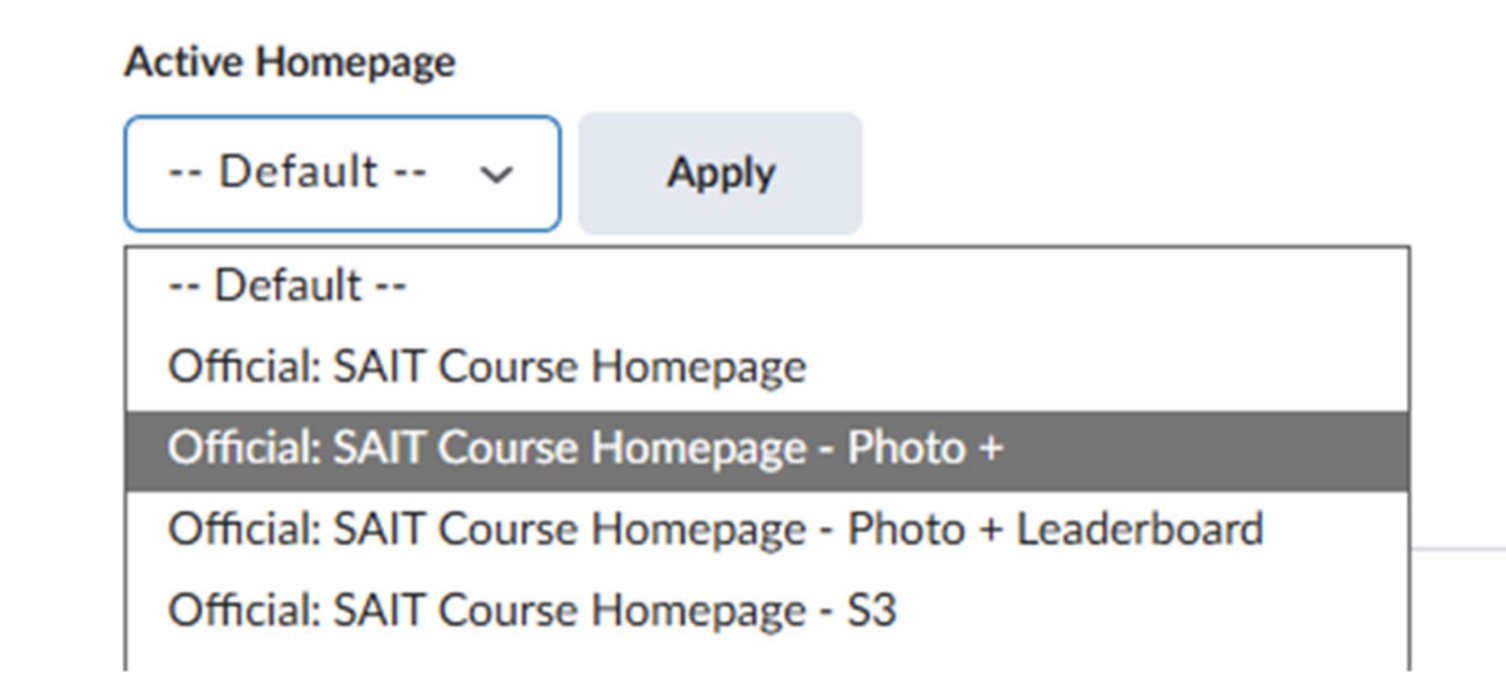
Select the Photo + option, then click the Apply button.
Select Single Profile Widget
Return to the course homepage and click the drop-down arrow next to Single Profile Widget, then select Configure this Widget.
Change image
Click the Change background colour icon (next to the photo placeholder or photo, then select a background colour from the palette.
Save changes
Click the Save button, then scroll down to the bottom of the Single Profile Widget box and click Save again.
Create a course glossary
From the course home page, click Content in the top navigation bar
In the top menu, click Course Tools
Select Glossary from the drop-down menu
Begin adding terms
Add new terms
At the top of the page, click New Term
In the Term field, enter the word you’re defining
In the Definition box, enter the definition
This box also gives you access to Creator+ tools, if needed.
Click Save
Edit an existing term
Find the term in the course glossary
Click the drop-down arrow to the right of the word
Select Edit Term
On the Edit Term page, make any required changes
Click Save
Link the course glossary to the main content page
On the main glossary page, copy the page URL
Then, return to the main content page.
Select the Learner Resources folder
Click Add
Select Create New
You will be prompted with the question, “What would you like to create?” Select Weblink.
Enter the following
- Web Link Title: Course Glossary
- Description: A description of the linked page
- Example: This course glossary is a quick-reference guide to important [course topic] terms used throughout the course. Use it anytime you need to review definitions or refresh your understanding of key concepts.
- External link: The URL you copied from the Glossary page
Click Save and Close
Uploading images
Go to your course in Brightspace
Click More > Instructor Tools > Manage Files
Navigate to the folder where you want to upload the image (this will normally be the associated unit).
Click Upload
In the Upload window, click Upload again. The File Explorer will open.
Select your image
Navigate to where you stored the image, then click it to select it.
Save your image
Once you've selected your image, click Open, then Save. The image will appear in the folder.
To rename the file, click the down arrow to the right of the file name.
Click Content
Then go to the page where you want to add the image.
Click Options ( …) on the top-right of the page
Select Edit
Place your cursor where you want to insert the image
Click the Insert Image icon
In the Submit a File window, select Course Offering Files
Navigate to the folder where you uploaded the image
Select the file and click add
Add alternative text
You will be prompted to provide alternative text:
- In the Alternative Text field, add brief text (ideally under 125 characters) describing the image.
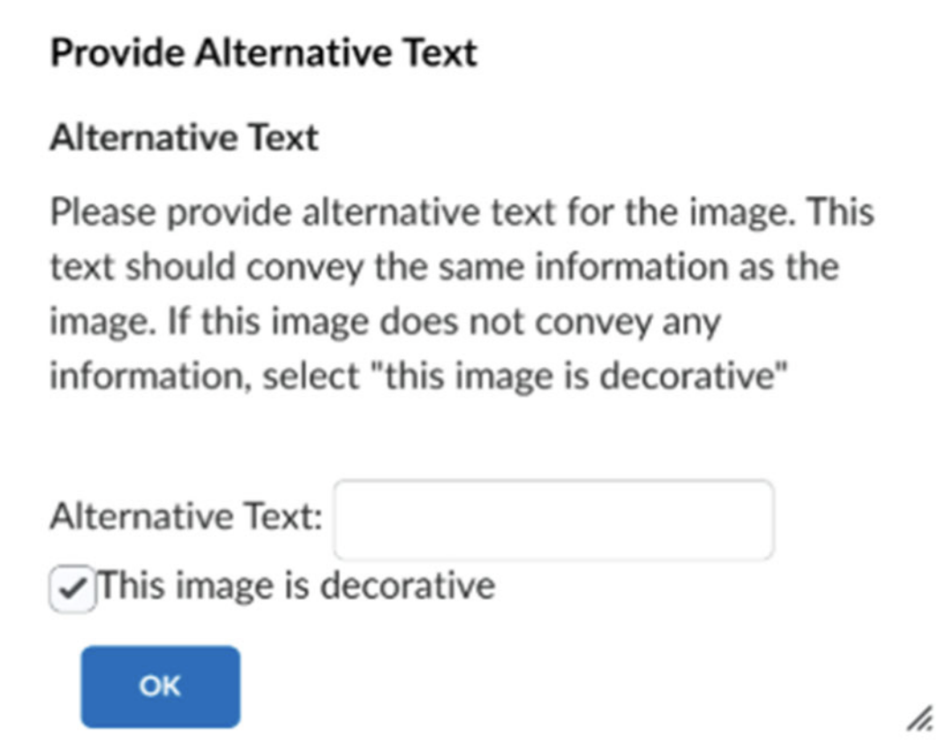
- If the image is decorative, do not provide alt text. Instead, select the This image is decorative checkbox.
Click OK
The image will default to the width of the page.
Resizing images
Right-click the image
Select Edit image
Click the Resize icon (second from left)
Update the image size
Change the numbers in the “Width” or “Height” fields as needed. Note: When you adjust either of these numbers, the other number will automatically update to maintain the original image ratios.
Click Apply, then Save
Crediting images
All SAIT documents must comply with copyright law. Every image we use in our courses needs a credit line that:
- credits the creator
- names the image source
- provides copyright information or explains why we have permission to use the image.
When to use decorative images:
- To add visual interest to course pages.
- The image does not contain information that students need to learn.
- The image doesn't require a title.
- The image doesn't require alternative text for screen readers.
Decorative image with credit line

Education License
Credit line format
If the copyright owner specifies how credit should appear, follow those requirements. Check the website’s Terms of Use for online images or contact SAIT’s copyright officer at copyright@sait.ca.
If you are unsure of what to include in the credit line, consult the next table and find the source that most closely matches yours.
For formatting choices such as text size, follow the credit line style in the current Brightspace course template.
How to mark an image as decorative
When you insert a decorative image in Brightspace, select the checkbox that indicates it is decorative, so that screen readers will narrate that information to listeners:
When to use instructive images:
- The image explains or illustrates a concept.
- The image contains information that students need to learn.
- The image requires a title.
- The image requires alternative text for screen readers.
Instructive image with title and credit line
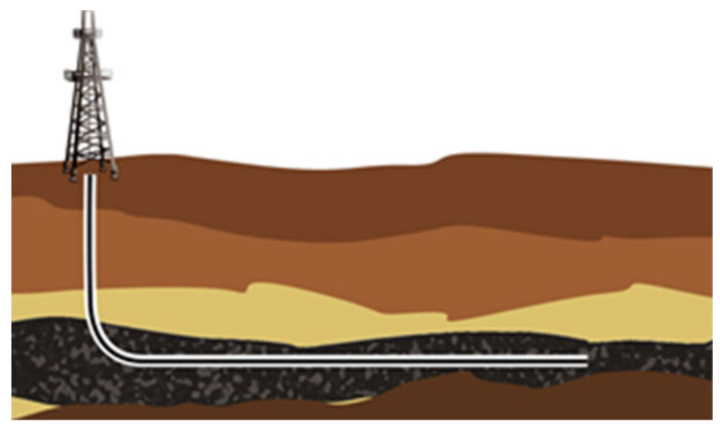
© 2013, Southern Alberta Institute of Technology
Title format
- Only use a title if the image contains information students need to learn.
- Make sure the title describes the image.
- For formatting choices such as text size, use the credit line style in the current Brightspace course template.
If students need to reference several similar technical images in the same section, you could also add figure numbers in the titles to help differentiate the images. Example: Figure 1, Figure 2, etc.
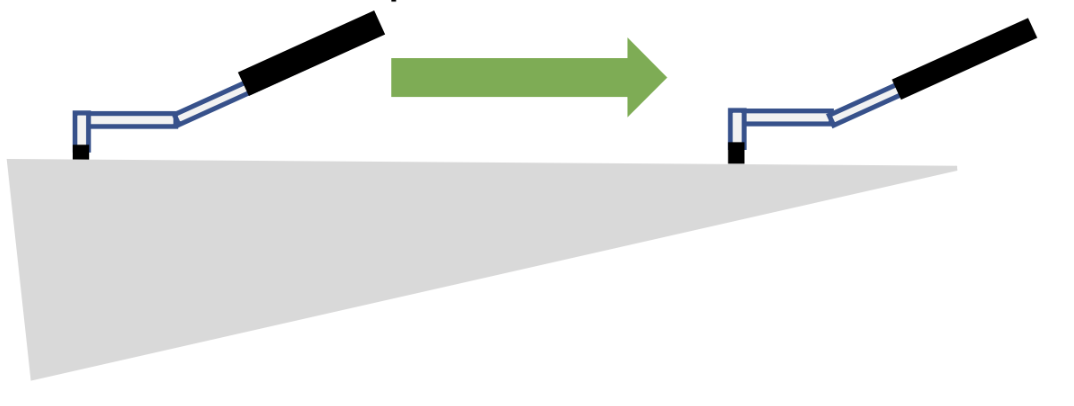
How to add alt text in Brightspace
When inserting an instructive image in Brightspace, include a short explanation of what the image represents.
The screen reader will narrate this alternative (alt) text in place of the image for students who are relying on audio.
Here’s an example:
Examples of common credit lines
Credit line
© <Year>, Southern Alberta Institute of Technology
Example
© 2013, Southern Alberta Institute of Technology
Notes
- The copyright year is the first year the image was published.
- Because this image is instructive, a title is included.
Credit line
Source: Stock.adobe.com, #<image file number> by <Creator or Agency Name>, Education License
Example
Education License
Notes
- In this example, “Vasyl” is the creator’s name.
- Because this image is decorative, no title is included.
Credit line
Source: Pixabay.com, #<image number with link> by < Creator or Agency Name>
Example
Source: Pixabay.com, #2181904 by Pexels
Credit line
Source: Colourbox.com, #<image number> by <Creator or Agency Name>
Example
Notes
- To set up your Colourbox account, follow the instructions on Libguides.
Credit line
Source: This image was generated with the assistance of AI, <year>, <AI Generating Program>
Example
Source: This image was generated with the assistance
of AI, 2026, Copilot
Credit line
© <Year>, <Creator or Agency Name>, <image URL>
(<CC licence type with link>)
Example
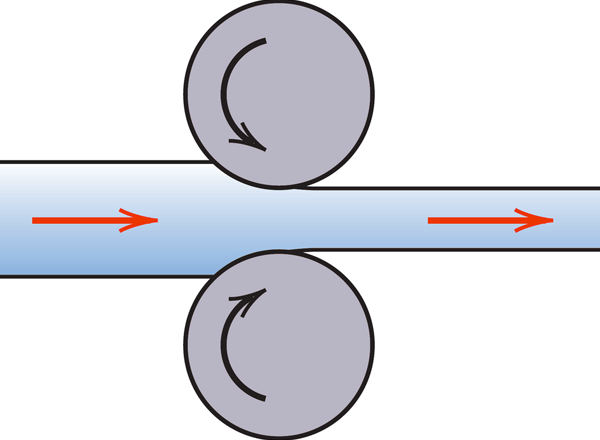
© 2009, Meisam, http://commons.wikimedia.org/wiki/File:Rolling.png
(CC BY-SA 3.0)
Notes
- Read about different types and terms of Creative Commons at creativecommons.org/licenses or contact SAIT’s copyright officer at copyright@sait.ca
Credit line
Source: <Creator or Agency Name>, <year>.
Reproduced and used in accordance with the fair dealing provisions in section 29 of the Canadian Copyright Act for the purposes of education, research or private study. Further distribution may infringe copyright.
Example
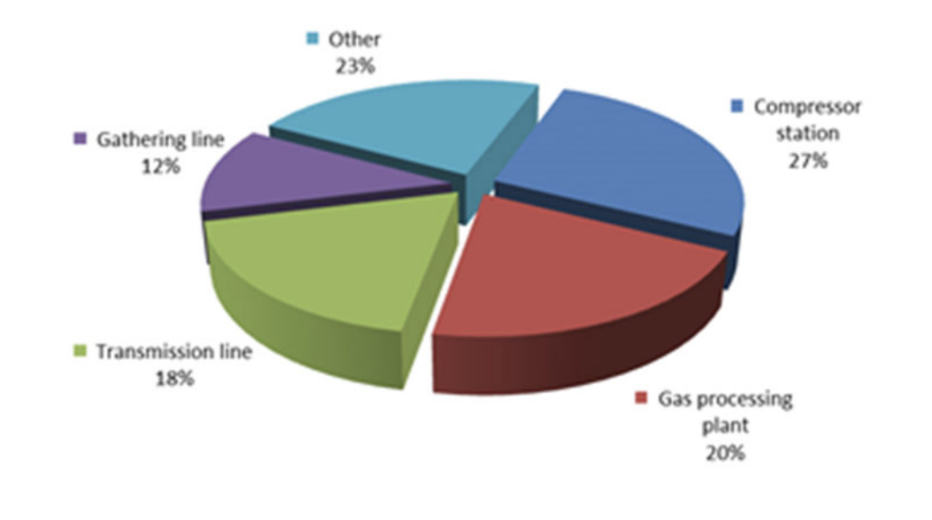
Source: Transportation Safety Board of Canada, 2014.
Reproduced and used in accordance with the fair dealing provisions in section 29 of the Canadian Copyright Act for the purposes of education, research or private study. Further distribution may infringe copyright.
Notes
- Make sure the creator or agency name and year correspond with a full APA citation in the References section at the end of the Brightspace page or document you are creating.
Credit line
Source: Individual Learning Module <module #>, © <year originally published>, NAIT and SAIT
Example
Credit line
© <Year>, <Copyright owner>. Used with permission.
OR
Source: <Creator or Agency Name>, <Publisher or linked URL>. Used with permission.
Example
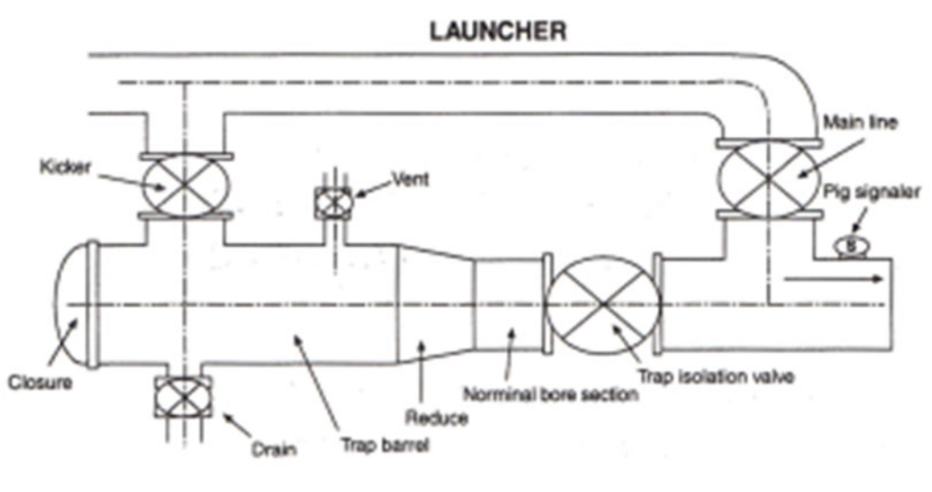
© Girard Industries. Used with permission.
Notes
- If the copyright owner has given written permission to use an image, a copy of the permission must be filed with SAIT's copyright officer (copyright@sait.ca).
Credit line
© <Year>, <Copyright owner>. Used with permission. (Instructor Resources)
OR
Source: <Creator or Agency Name>, <Publisher or linked URL>. Used with permission. (Instructor Resources)
Example
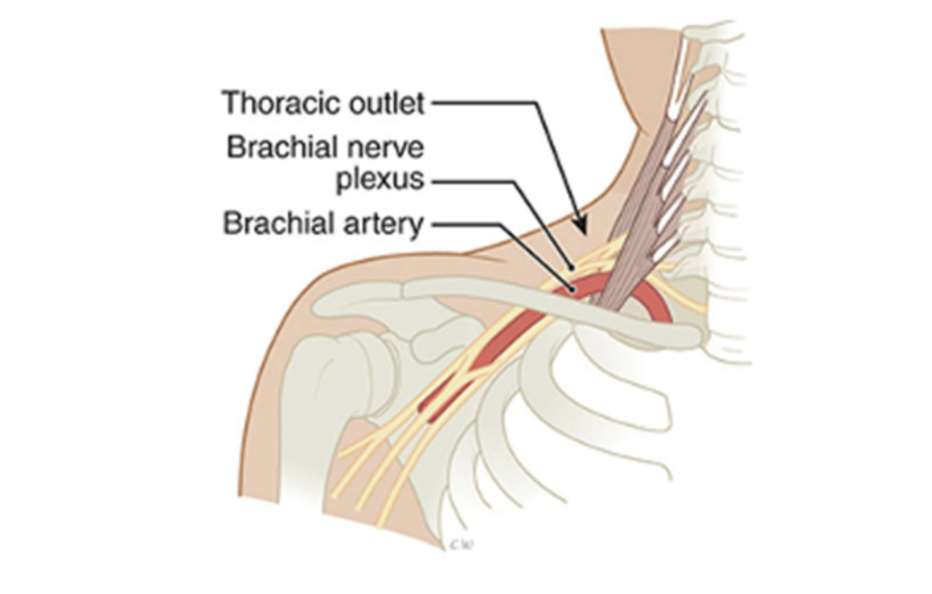
© 2026, Jill S. Gehrig, Rebecca Sroda and Darlene Saccuzzo/Jones and Bartlett Learning.
Used with permission. (Instructor Resources)
Credit line
© <Year>, Southern Alberta Institute of Technology
Example
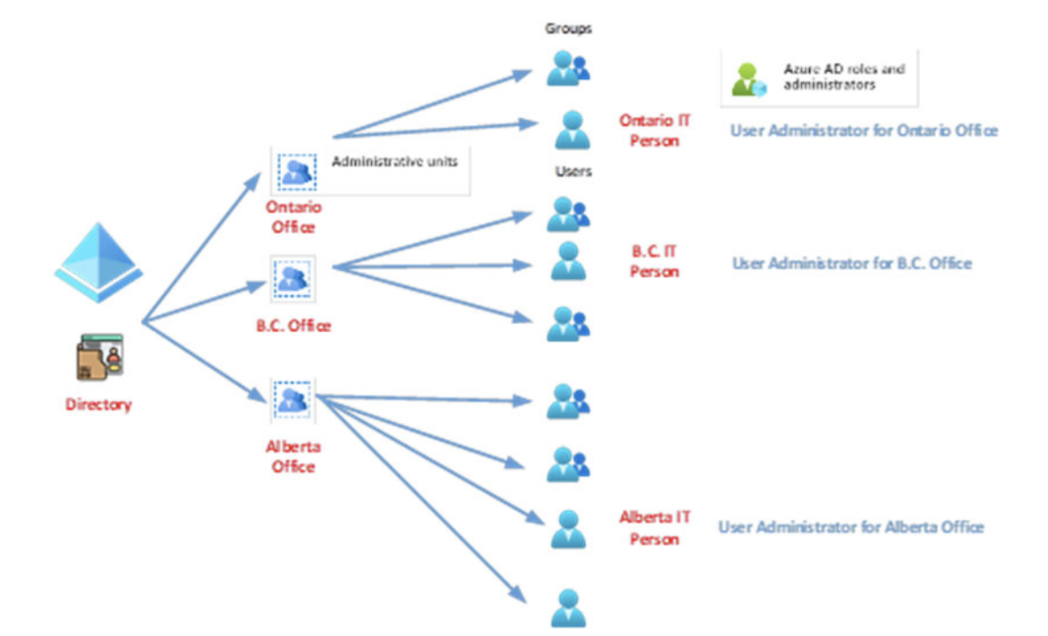
© 2023, Southern Alberta Institute of Technology. This figure was designed with icons from Flaticon.com and Microsoft Azure.
Notes
- Use the attribution format requested by the icon source website. Microsoft icons may be used freely for Microsoft product training.
Credit line
Source: Still from <video title> by <author>, full URL with hyperlink.
Reproduced and used in accordance with the fair dealing provisions in section 29 of the Canadian Copyright Act for the purposes of education, research or private study. Further distribution may infringe copyright.
Example
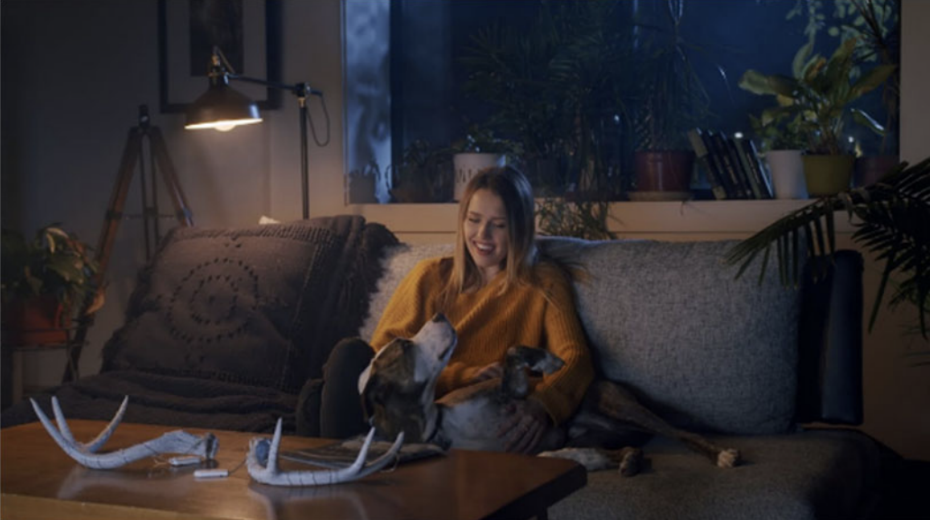
Source: Still from How to Light a Night Scene | Cinematic Lighting by Brady Bessette, https://www.youtube.com/watch?v=_g3KXE3QQ4Y.
Reproduced and used in accordance with the fair dealing provisions in section 29 of the Canadian Copyright Act for the purposes of education, research or private study. Further distribution may infringe copyright.
Credit line
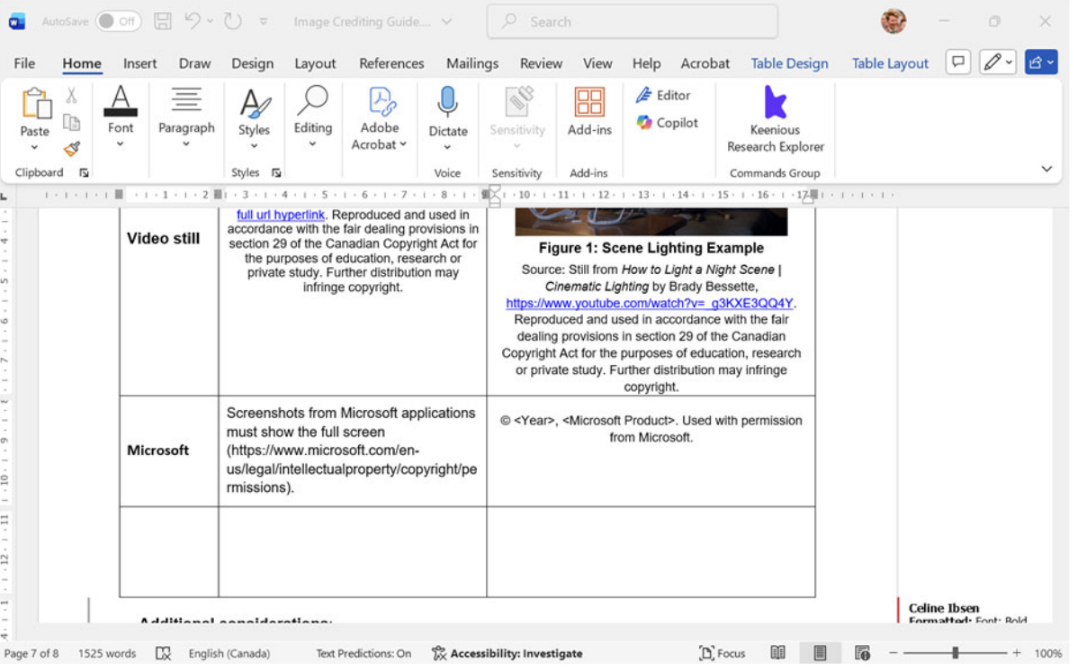
© <Year>, <Microsoft Product>. Used with permission from Microsoft.
Example
Additional crediting considerations
If you create a new image based on published material, credit the original material:
Adapted from: <Copyright owner or Creator>, <Year>, <Publisher or linked URL>
If you use an image that is in the public domain, credit it for academic honesty:
Source: <Copyright owner or Creator>, <Publisher or linked URL> (Public Domain)
Example: Source: 2018, U.S. Department of Transportation. https://www.faa.gov/sites/faa.gov/files/regulations_policies/handbooks_manuals/aviation/FAA-H-8083-32-AMT-Powerplant-Vol-1.pdf. (Public Domain)
If no date is provided with an image, but you can find other copyright information, it's ok to omit the date.
If you encounter a source that is archived or source links that bring up “404 Page Not Found”, use the following format:
Last, F.M. (YYYY, Month DD). Name of Web Page. Name of Website. Retrieved from www.sampleurl.com. Archived at www.archiveurl.com
These types of sources sometimes appear in older reused material. For finding archived or "404" webpages, visit web.archive.org.
Common emojis used in Brightspace
Use emojis to enhance the appearance of your Brightspace course. Download emojis directly from Emojipedia or from the Brightspace emoji menu to ensure image integrity.
| Emoji | Where used |
|---|---|
| 💻 | Use of generative AI in course design |
| ⚠️ | Important information about links |
| 📚 | Course readings and resources |
| 🧩 | Activity (multimedia or in class) |
| ✏️ | Self-test |
| 🔬 | Lab activity |
| ✅ | Assessment |
| 🗓️ | Course schedule |
| 📝 | Instructor notes |
| 🖥️ | Presentations |
| 🛠️ | Brightspace resources |
| 🗝️ | Common emojis used in Brightspace |
| 📃 | Course logs |
| Emoji | Where used |
|---|---|
| 🕐 | Duration |
| 📝 | Instructor notes |
| 🎯 | Lab objectives |
| 🔑 | Lab answer key |
| ⚖️ | Assessment weight |
| 📘 | Introduction |
| ⚠️ | Safety precations |
| 🧪 | Equipment or materials |
| 🔎 | Pre-lab activity |
| 📺 | Watch and learn |
| 🥽 | Lab procedure/instruction |
| ✍️ | Lab observations |
| 🧠 | Analysis/reflection questions |
| 💬 | Discussion questions |
| 🏅 | Class challenge |
| ✏️ | Quiz |
| 🔙 | Return to top |
Using AI to draft courses in Brightspace
SAIT’s AI guidelines specify that we use certain approved GPTs for generating SAIT content.
Although Copilot 365 is available for all SAIT staff, we recommend using ChatGPT EDU, which is
also approved, although licenses may be limited. The following instructions are based on ChatGPT.
Copilot may produce different outputs.
Collect all relevant source materials for your course
For example, the course learning design and any existing PowerPoints, Word documents, lecture notes, etc.
Prompt the AI by giving it a specific role and task, and upload source files or paste in sections of source text so the AI can use it to create its output
Prompt example:
"You are an instructional designer for an online course. Using this outcome [paste outcome], objectives [paste objectives] and attached documents [upload relevant files, like the course learning design, PowerPoints, Word documents, lecture notes], organize this into lessons in Brightspace [reference the course objective it aligns with], that are clear and concise for the learner."
The AI organizes the content into digestible lessons.
Review the output thoroughly and refine the prompts further
Prompt examples:
"Combine lessons 3 and 4" or "Rewrite the titles so they’re clearer and more concise".
Continue to refine the prompts and manually rewrite content as required
When you’re happy with the lesson setup and titles, update the lesson titles in the LD
Open your course in Brightspace
Generate lesson pages in each unit and then copy in each lesson title from ChatGPT
Don’t include the lesson number. This creates more maintenance in the future.
Don’t complete the lesson content yet. Just create all the pages and name them.
Prompt the AI to generate content for each lesson in clear, student-friendly text
You can also upload an example template or starter lesson code.
To keep the tone consistent across all lessons and units, use the same wording in your prompts
For example, plain, professional, or not too technical.
If possible, make sure each lesson in the course has a consistent structure
For example, introduction, content sections, interactive activities, reinforcement video, and summary.
Prompt example:
"Generate Lesson 1: (Introduction to Fluoroscopy) in a learner-friendly style.
Include an intro statement, content page sections, a reinforcement video suggestion, and a short bullet-point summary. Only use content from the PowerPoint provided."
Review the outputs carefully for accuracy, repetition and wordiness, refine your prompts and rewrite content as necessary
Paste your Lesson 1 content from the AI tool into Brightspace
Review the content carefully and modify and rewrite it
This is also a good time to make any changes to the layout and consider which interactive elements would enhance the content.
Pro-tip: View the lesson output on one screen and your original content on another to make it easier to compare the two and ensure the AI output has included all the important content you want to cover.
If it’s helpful, continue to use the AI tool to reword text or provide additional examples
To create introductions
Once you’re satisfied with the content of the lesson, copy the code back into the AI and prompt it to generate a draft introduction (e.g., In this lesson, you’ll….).
Make sure the introduction aligns with the unit’s outcome and objectives.
To create lesson summaries
Prompt the AI to generate a lesson summary to include at the end of the lesson.
Prompt example:
"Write a clear, concise bullet-point summary with 5–8 bullet points for Lesson 1."
To draft Creator+ elements
Use the AI tool to draft Creator+ elements like multiple-choice questions, sorting, accordions and hot spots.
Prompt example:
"Using content from my unit [paste your unit code], create two multiple-choice questions with specific feedback for each option, and one matching activity. Focus on [specific topics or definitions].
To curate multimedia content (video and images)
You can also ask AI to recommend reinforcement videos from YouTube.
Prompt example:
"Find a short YouTube video that explains pulsed fluoroscopy and how it reduces dose. Suggest how to embed it into the lesson with a guiding question."
Generate diagrams or images for hotspot activities using AI image generation.
Prompt example:
"Generate a clean diagram of a medical imaging monitor with three hotspots labelled: Noise (top-left), Lag (center), and Quantum Mottle (bottom-right), for a Brightspace Creator+ hotspot activity."
Carefully review the AI video suggestions and images for accuracy and relevance.
You’ll use unit 1 as a template for the remaining units, so it’s worth spending some time to ensure that it’s well-structured and contains a variety of elements.
Use the code from lesson 1 as the template for all subsequent lessons.
Open the HTML code window for lesson one
Copy all the code
Use keyboard shortcut CTRL+A, then CTRL+C.
Go to your AI tool and use the code in your prompt
Prompt example:
"Using this content [paste your lesson 1 content], generate Lesson 2 [lesson title]. Format the lesson using this template format and code [paste lesson 1 code]. Do NOT format the Creator+ elements. I will do this on my own."
The AI tool generates the code.
Copy the output and paste it into your lesson 2 page
If you let the AI generate the Creator+ code at this step, it will, but you won’t be able to edit it.
Copy the intro and summary from lesson 1 into your AI prompts to help it more accurately generate consistent intros for the remaining lessons
Prompt example:
"Reword this activity intro in a consistent tone for Lesson 1. Then generate intros for Lessons 2 to 8 using the same style."
Tips for maintaining consistency across a course
Always use the same structure. For example:
- Intro
- Content pages (with Creator+ tabs/accordions)
- Interactive activity (Creator+)
- Reinforcement video and/or images
- Summary (bullet points)
You can also ask AI to check for consistency of tone and layout across lessons.
Summary
Using AI can give you a good starting point to quickly move from static PowerPoints to dynamic
Brightspace units with interactive lessons. Use AI to help you break content into chunks, draft
learner-friendly text, design activities, create images and suggest multimedia, while maintaining a
consistent tone. It can even create code and generate interactive elements that you can paste into
Brightspace.
How can we help?
Every teaching context is different. Let's start with a conversation about your goals, your learners, and your ideas.
Oki, Âba wathtech, Danit'ada, Tawnshi, Hello.
SAIT is located on the traditional territories of the Niitsitapi (Blackfoot) and the people of Treaty 7 which includes the Siksika, the Piikani, the Kainai, the Tsuut’ina and the Îyârhe Nakoda of Bearspaw, Chiniki and Goodstoney.
We are situated in an area the Blackfoot tribes traditionally called Moh’kinsstis, where the Bow River meets the Elbow River. We now call it the city of Calgary, which is also home to the Métis Nation of Alberta.